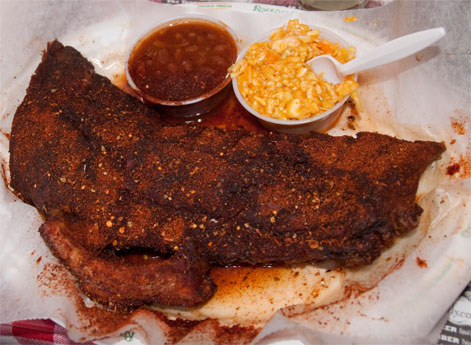
I’ve written before about our friend Craig Goldwyn and his Amazing Ribs website. Ribs are better cooked outdoors but this time of year here is his great recipe for cooking ribs indoors.
———————————————
Ribs cooked on a smoker or a grill are always better than indoor ribs, but if you don’t have a grill or there’s a blizzard, this technique makes tender, juicy ribs indoors all year ’round. The meat bathes in a hot, moist, sauna-like atmosphere, and when it is ready it practically falls off the bone. There is no need to marinate or brine this meat.
If you are in a hurry, you might also want to try my Rendezvous Ribs recipe. It works darn well indoors.
Recipe
Yield. One slab of baby back ribs
Preparation time. About 30 minutes.
Prep and cooking time. About 3 1/2 hours
Note. If you use thicker, heavier cuts such as spareribs or St. Louis Cut ribs, add 2 hours to the cooking time.
Ingredients
1 slab of baby back ribs
4-6 teaspoons Meathead’s Memphis Dust
1 tablespoon vegetable oil
1 cup of barbecue sauce
About Memphis Dust. If you can find sweet smoked paprika, grab it and use it in the rub instead of regular paprika. This will add a nice background layer of smoke to the dish. Most smoked paprika is hot, so it will be too much for a rub unless you have an asbestos tongue.
About the sauce. You can use a store-bought sauce or one of the recipes on this site such as “Kansas City Classic Sauce” . If you go for a store bought, get one that calls itself “smoky”. That means it has liquid smoke added. Liquid smoke is made by capturing smoke and condensing it. It adds an outdoorsy taste to this indoorsy recipe. If you wish, you can add about 1/4 teaspoon of liquid smoke to the barbecue sauce after you taste it.
Note. Resist to the temptation to put liquid smoke in the water. Been there done that. Stunk up the house and had to sleep on the couch that night.
Do this
1) Use a broiler pan if you have one. If you don’t have a broiler pan you can use any pan with a wire grate on top. A roasting rack inside a pan will do. You can even use an oven grate with a pan underneath. The idea is to keep the meat from wallowing in the fat that renders from the meat when cooking, and catch the plentiful drips so they don’t hit the bottom of the oven and catch fire. If necessary, cut the slab to fit over the pan. Coat the convex (meaty) side with oil and season it with Meathead’s Memphis Dust. Do not oil and season the concave (bone) side. It has a tendency to burn in the next step. If time permits, you can wrap the meat with plastic wrap and let it sit in the refrigerator overnight. The oil helps the rub penetrate slightly, like a dry marinade, and both the oil and rub also help the meat brown and form a crust.
2) About 3 1/2 hours before dinner, put an oven rack in the middle of the oven. Put the broiler pan onto the rack and pour in enough hot water to fill it about 1/2″ to 1″ deep. Place the meat on the rack above pan, meaty side down right above the water. Broil (on medium if your oven offers the option) for about 5 minutes watching it carefully with the door of the oven open partially. Leaving the door open makes sure the broiler doesn’t switch off. The fat on the underside should start to bubble and melt and the bottom should brown. Do not let it burn. When it is brown, turn it over, meaty side up. Switch to bake for 3 hours at 225°F and close the oven door. Check every 30 minutes or so to make sure the water has not evaporated. If it has, add more.
3) Read this article to see how to tell when the meat is ready. Use the bend test to make sure it is done. When it is, turn the slab meaty side down. Slather the bone side with the sauce and broil for 5 minutes with the oven door partially open or until the sauce bubbles, watching closely to make sure it doesn’t burn. We leave the door open so the oven cools a bit and to make sure the thermostat doesn’t turn off the broiler. Repeat for the meaty side. Serve.
